Introduction
Pergolas are beautiful additions to any home, offering both aesthetic appeal and functional outdoor living space. Attached pergolas, in particular, integrate seamlessly with your existing structure, enhancing your home’s architectural style while providing a shaded area for relaxation, dining, or entertaining. This guide will walk you through the entire process of building an attached pergola, from planning and design to construction and maintenance.
Chapter 1: Planning Your Attached Pergola
1.1 Understanding the Purpose
Before you begin designing your pergola, it’s essential to understand its purpose. Are you looking for a shaded area to enjoy hot summer days, a space for outdoor dining, or a stylish addition to improve your home’s curb appeal? Understanding your primary goal will help you make informed decisions throughout the planning and building process.
1.2 Assessing the Location
Choosing the right location for your pergola is crucial. Consider factors such as sun exposure, wind patterns, and proximity to your home. The pergola should complement the existing architecture and landscape. Additionally, ensure that the area is free of underground utilities and overhead obstructions.
1.3 Measuring the Space
Accurate measurements are vital for a successful project. Measure the height, width, and depth of the area where you plan to build the pergola. Consider the size of the furniture or other elements you want to place under the pergola to ensure it will fit comfortably.
1.4 Budgeting
Set a realistic budget for your project. Consider costs for materials, tools, permits, and potential professional help. Having a clear budget will guide your material choices and design decisions.
1.5 Checking Local Building Codes and Permits
Before you begin construction, check with your local building authority to determine if you need permits for your pergola. Building codes vary by location, and you may need to adhere to specific regulations regarding the size, height, and attachment method of your pergola.
Chapter 2: Designing Your Attached Pergola
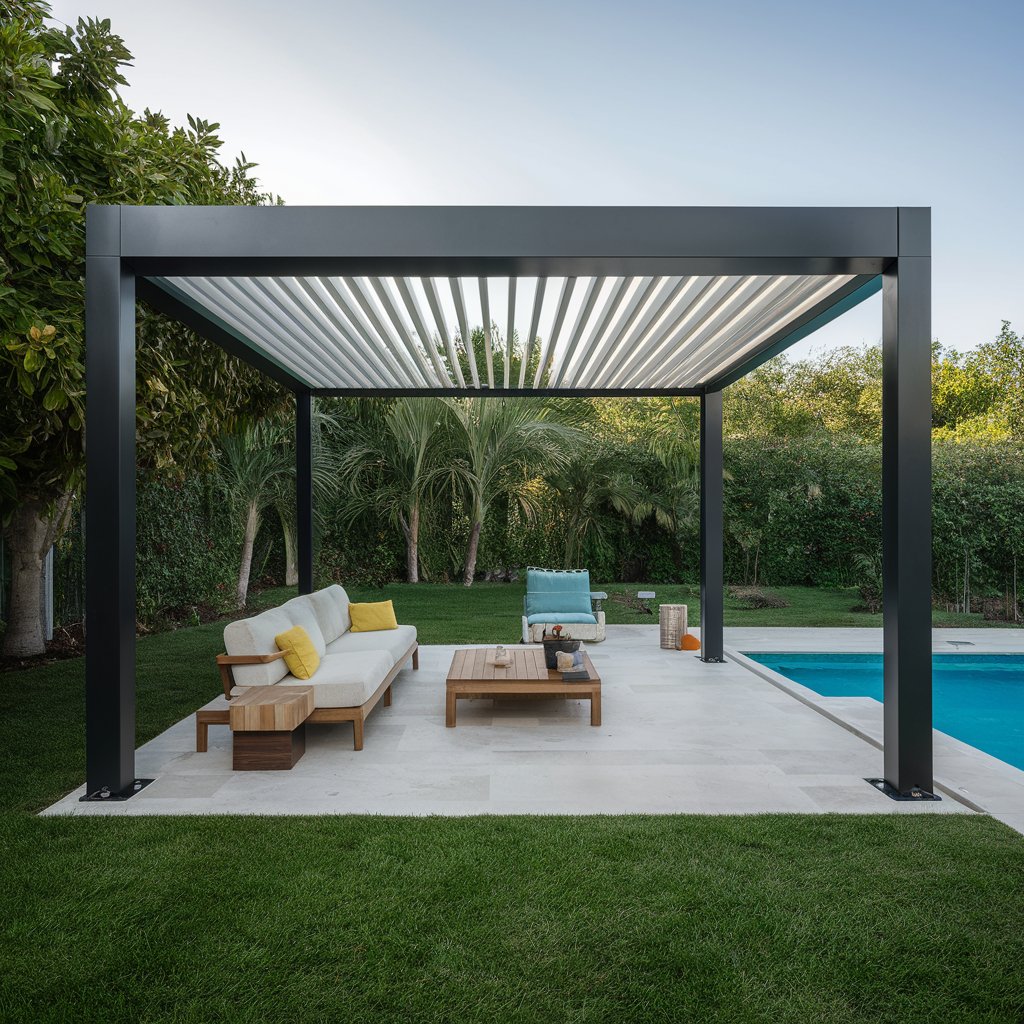
2.1 Choosing a Style
Pergolas come in various styles, from traditional to modern. Choose a style that complements your home’s architecture. Consider the shape of the roof (flat, gabled, or arched) and the design of the beams and rafters.
2.2 Selecting Materials
The materials you choose will impact the durability, maintenance, and overall look of your pergola. Common materials include:
- Wood: Cedar, redwood, and pressure-treated pine are popular choices due to their natural beauty and resistance to decay. However, wood requires regular maintenance to prevent weathering and rot.
- Metal: Aluminum and steel pergolas are durable and low-maintenance. They can be powder-coated in various colors to match your home’s exterior.
- Vinyl: Vinyl pergolas are low-maintenance and resistant to rot and insects. They are available in various colors and styles but may not have the same natural look as wood.
2.3 Designing for Functionality
Consider how you will use your pergola. If you want more shade, design your pergola with a denser rafter pattern or add a retractable canopy. For climbing plants, include trellises or lattice panels. Make sure the height and size of the pergola accommodate your intended use.
2.4 Drawing Detailed Plans
Create detailed plans and drawings of your pergola. Include measurements, attachment points, and a list of materials. Detailed plans will help you stay organized and ensure all elements fit together correctly during construction.
Chapter 3: Gathering Materials and Tools
3.1 Creating a Material List
Based on your design plans, create a comprehensive list of materials you will need. This may include:
- Ledger board
- Posts
- Beams
- Rafters
- Fasteners (screws, bolts, brackets)
- Concrete for post footings
- Anchors
- Stain or paint (if using wood)
3.2 Selecting Tools
Ensure you have all the necessary tools for the job. Common tools for building a pergola include:
- Tape measure
- Level
- Circular saw or miter saw
- Power drill and bits
- Hammer
- Wrenches and sockets
- Post hole digger
- Concrete mixer (if needed)
3.3 Purchasing Materials
Once you have your material list, purchase everything you need. Consider buying a little extra material to account for mistakes or adjustments. If you’re using wood, inspect each piece for quality and straightness.
Chapter 4: Preparing the Site
4.1 Clearing the Area
Clear the construction area of any debris, plants, or obstacles. Ensure the ground is level. If necessary, use a shovel to level the area where the posts will be placed.
4.2 Marking the Layout
Use stakes and string to outline the footprint of your pergola. This will help you visualize the space and ensure your measurements are accurate. Mark the locations for your posts, ensuring they are evenly spaced and aligned with your design plans.
4.3 Digging Post Holes
Use a post hole digger to create holes for your pergola posts. The depth and diameter of the holes will depend on the size of your posts and local building codes. A common guideline is to dig holes one-third the height of the post above ground.
Chapter 5: Building the Pergola
5.1 Installing the Ledger Board
The ledger board is the horizontal beam attached to your house that supports one side of the pergola. Follow these steps to install it:
- Locate the Studs: Use a stud finder to locate the wall studs in your house where the ledger board will be attached. Mark their locations.
- Position the Ledger Board: Hold the ledger board against the house, ensuring it is level and aligned with the marks you made. The height of the ledger board should correspond to the height of your pergola roof.
- Drill Pilot Holes: Drill pilot holes through the ledger board and into the wall studs. This will prevent the wood from splitting and ensure a secure attachment.
- Attach the Ledger Board: Use lag bolts or heavy-duty screws to attach the ledger board to the wall. Ensure it is securely fastened and level.
5.2 Setting the Posts
The vertical posts support the pergola structure. Follow these steps to set them in place:
- Position the Posts: Place the posts in the holes you dug earlier. Use a level to ensure they are plumb (vertically straight) and aligned with your layout markings.
- Brace the Posts: Temporarily brace the posts with scrap wood or clamps to keep them in position.
- Pour Concrete: Mix and pour concrete into the holes around the posts. Allow the concrete to set according to the manufacturer’s instructions, usually 24-48 hours.
5.3 Attaching the Beams
The beams span between the ledger board and the posts, providing the main support for the rafters. Here’s how to attach them:
- Measure and Cut Beams: Measure and cut your beams to the correct length. Ensure they are long enough to span from the ledger board to the outer posts.
- Attach to Ledger Board: Use joist hangers or brackets to attach one end of each beam to the ledger board. Ensure they are level and spaced according to your design plans.
- Secure to Posts: Attach the other end of each beam to the posts using brackets or bolts. Check that the beams are level and secure.
5.4 Adding the Rafters
Rafters run perpendicular to the beams and provide shade and support for any covering. Here’s how to add them:
- Measure and Cut Rafters: Measure and cut your rafters to the correct length. They should extend slightly beyond the beams for a finished look.
- Space Evenly: Mark the positions for each rafter on the beams. Space them evenly according to your design plans.
- Attach Rafters: Use metal brackets or screws to attach each rafter to the beams. Ensure they are securely fastened and level.
5.5 Installing Crossbeams and Decorative Elements
For additional support and style, you may want to add crossbeams or decorative elements. Here’s how:
- Measure and Cut Crossbeams: Measure and cut any crossbeams or decorative elements to size.
- Attach to Rafters: Use screws or brackets to attach these elements to the rafters. Ensure they are securely fastened and aligned with your design.
Chapter 6: Finishing Touches
6.1 Sanding and Sealing
If you’re using wood, sand the surfaces to smooth out any rough spots. Apply a sealant, stain, or paint to protect the wood from weathering and UV damage.
6.2 Adding Shade Options
Consider adding a shade option to your pergola. Popular choices include:
- Retractable Canopy: A retractable canopy allows you to adjust the amount of shade as needed.
- Shade Cloth: Shade cloth can be attached to the top of the pergola for a simple and effective shading solution.
- Climbing Plants: Planting climbing vines like wisteria, ivy, or grapevine can provide natural shade and enhance the pergola’s beauty.
6.3 Decorating and Furnishing
Add furniture, lighting, and decorative elements to create a comfortable and inviting outdoor space. Consider adding outdoor furniture, cushions, string lights, lanterns, or potted plants to personalize your pergola.
Chapter 7: Maintenance and Care
7.1 Regular Inspections
Perform regular inspections of your pergola to check for any signs of damage or wear. Look for loose screws, cracks in the wood, or rust on metal components.
7.2 Cleaning
Keep your pergola clean by regularly sweeping away debris and washing the surfaces. Use a mild detergent and water to clean wood or vinyl surfaces, and a metal cleaner for metal components.
7.3 Re-Sealing or Re-Painting
If your pergola is made of wood, re-seal or re-paint it every few years to maintain its appearance and protect it from the elements. Follow the manufacturer’s instructions for the best results.
7.4 Pruning Climbing Plants
If you have climbing plants, prune them regularly to prevent them from becoming overgrown and to maintain a healthy growth pattern.
Chapter 8: Troubleshooting Common Issues
8.1 Structural Shifts
Over time, you might notice that the pergola’s structure shifts slightly. This can be due to ground movement, weather conditions, or natural settling. Regularly check the alignment of posts and beams and adjust them if necessary.
8.2 Wood Decay and Pest Infestation
Wooden pergolas are susceptible to decay and pest infestations. To prevent these issues, apply a wood preservative and inspect for signs of termites or other pests. Replace any damaged wood immediately.
8.3 Rust on Metal Components
If you notice rust on metal components, remove it with a wire brush and apply a rust-resistant paint or coating. Regularly inspect and maintain metal parts to prevent further corrosion.
Chapter 9: Enhancing Your Pergola Over Time
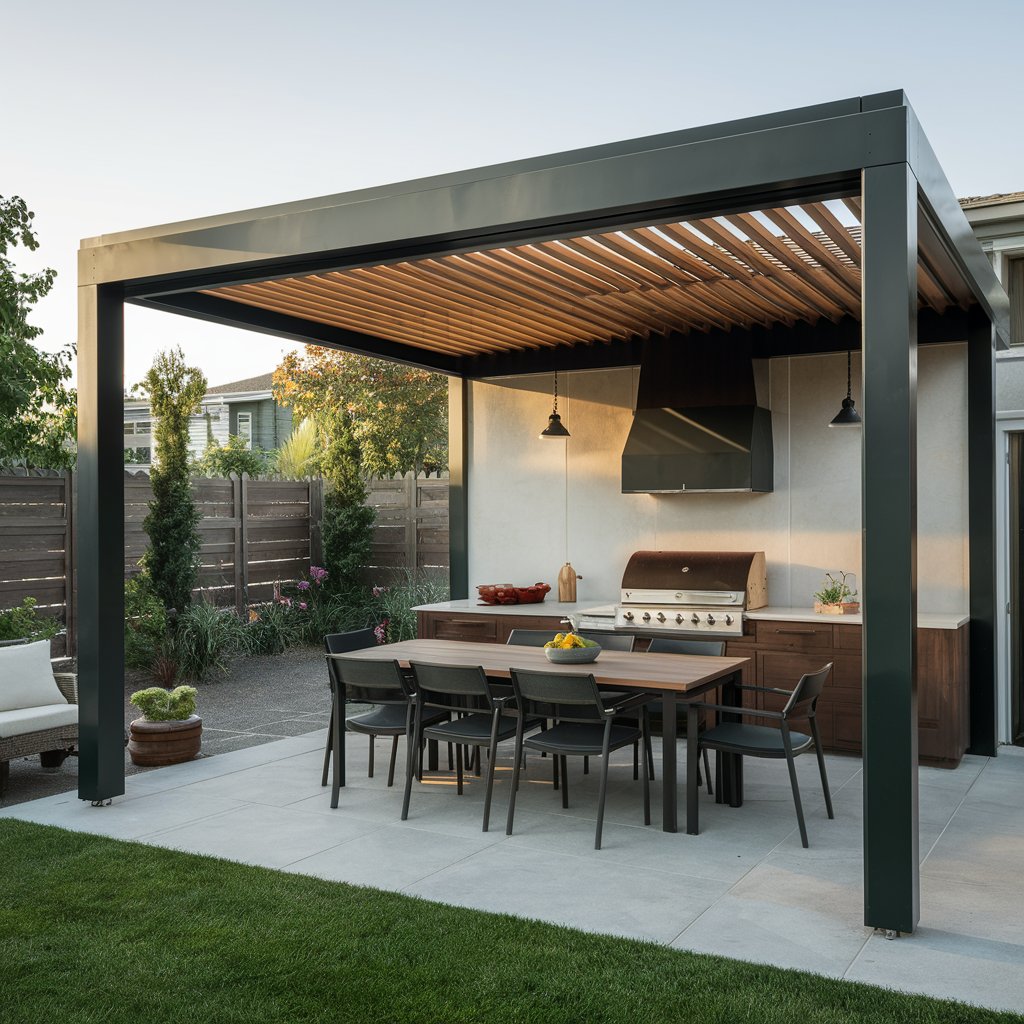
9.1 Adding Features
As you use your pergola, you might want to add features such as curtains for privacy, built-in seating, or even an outdoor kitchen. Plan these additions carefully to ensure they integrate well with the existing structure.
9.2 Seasonal Adjustments
Depending on the season, you might need to make adjustments to your pergola. For example, in winter, you might want to add clear panels to protect against snow and wind. In summer, consider additional shading options.
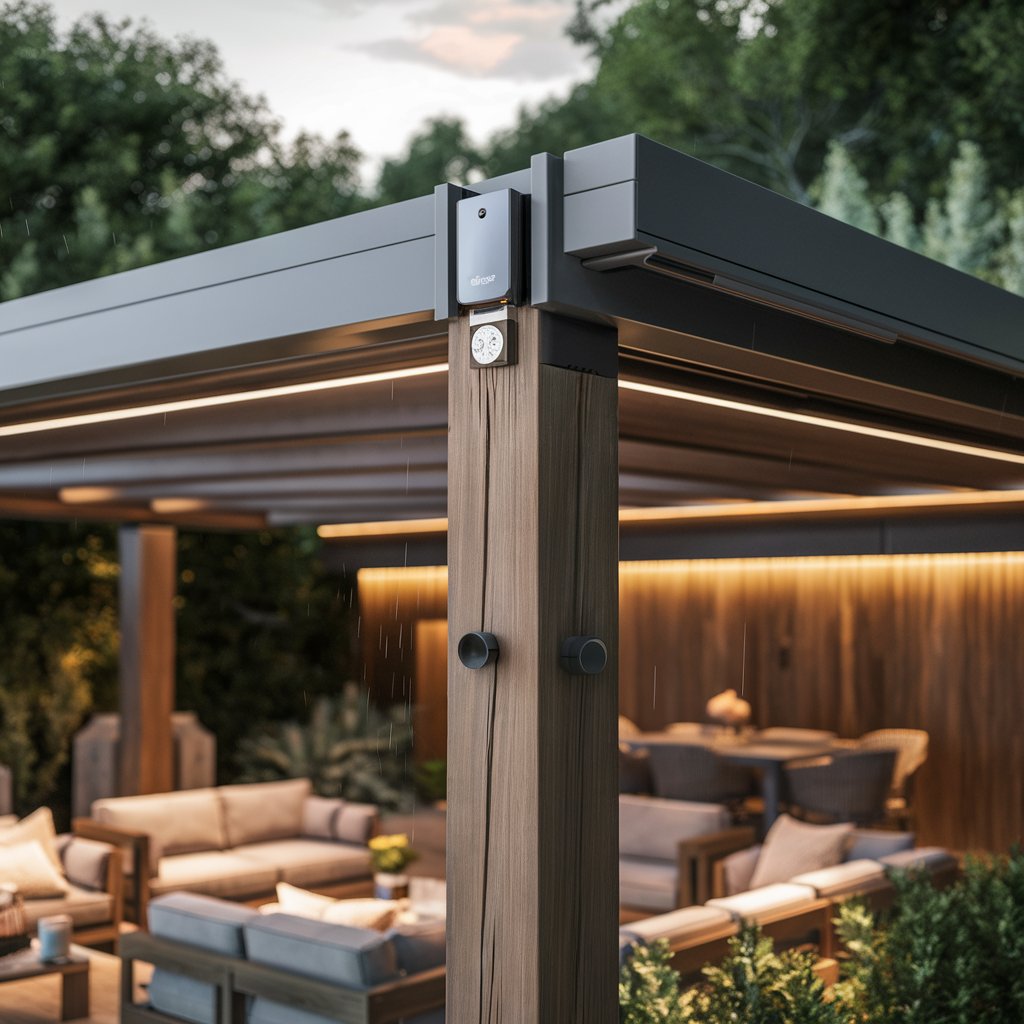
9.3 Lighting and Heating
Enhance your pergola’s usability by adding outdoor lighting and heating elements. String lights, lanterns, or LED fixtures can create a cozy atmosphere, while patio heaters or a fire pit can extend the use of your pergola into cooler months.
Chapter 10: Case Studies and Inspiration
10.1 Residential Pergola Projects
Explore examples of successful residential pergola projects to get inspiration and ideas for your own build. Look at different styles, materials, and features that homeowners have used to create beautiful and functional outdoor spaces.
10.2 Pergola Designs for Different Climates
Consider how pergola designs vary based on climate. For example, a pergola in a hot, sunny region might prioritize maximum shade, while one in a cooler, wetter area might focus on durability and weather resistance.
10.3 Incorporating Sustainable Practices
Learn about sustainable practices you can incorporate into your pergola project, such as using eco-friendly materials, incorporating rainwater harvesting systems, or planting native vegetation.
Conclusion
Building an attached pergola is a rewarding project that enhances your outdoor living space and adds value to your home. By carefully planning, designing, and constructing your pergola, you can create a beautiful, functional addition that will provide enjoyment for years to come. Regular maintenance and thoughtful enhancements will ensure your pergola remains a cherished part of your home.